lesson 11
A FEW PENCIL GRIPS FOR DRAWING!
TRY THEM OUT! WHICH ONE IS YOUR FAVOURITE?
It often takes years of experience to understand the importance of different pencil grips. But if you try different pencil grips, your drawings will improve, you can be sure of that.
If you always hold your pencil the same way for each of your drawings, you limit the possibilities of drawing lines. It’s no secret that variation is important in our drawings. By changing the way we hold our pencil, we immediately bring variety to our drawings.
Now let’s look at some examples of how you can hold your pencil while drawing:
“TRADITIONAL” GRIP:
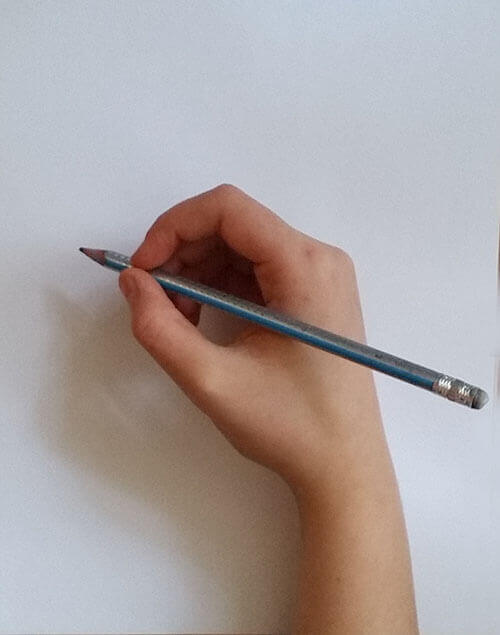
It’s just like when you’re taught how to hold a pencil when you’re writing. Most people hold it that way when they’re drawing. When I start drawing, it’s natural for me to hold the pencil like everyone else. This grip gives you great control over the lines when you’re drawing and is great for detail.
“DRUM BEAT” GRIP
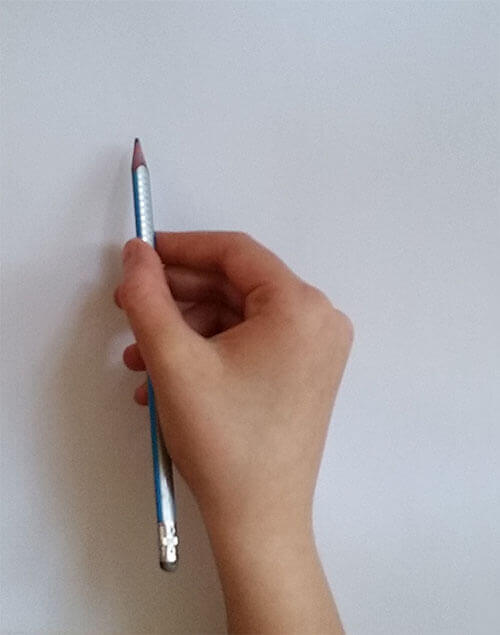
The pencil is loosely held between your index finger and thumb, while the other fingers only support the pencil.
With this grip, you can draw not only with the tip of the pencil, but also with the side of the tip. (for coloring, for example) This grip also helps you draw from your shoulder, not just your wrist. This helps you draw loosely. If you are drawing large, this is one of the best grips and allows for the greatest variation.
“BRUSH” GRIP
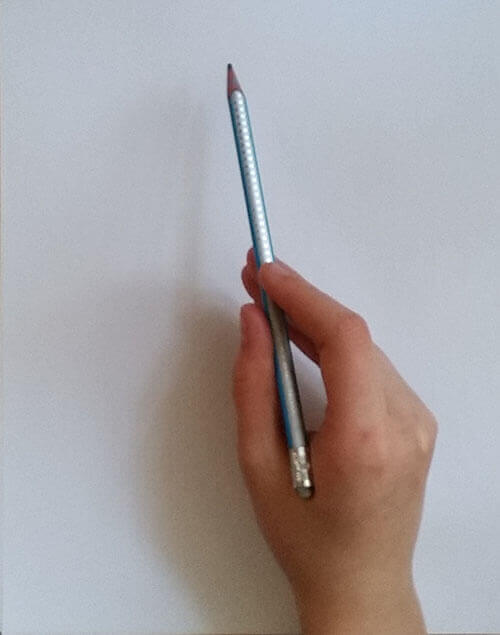
It is very similar to how we hold a paintbrush. The pencil is held vertically and the back end of the pencil rests in the crook of the index finger and thumb. This grip is perfect for drawing light and delicate lines. Usually the tip of the pencil touches the paper.
“PRESS THE POINT” GRIP
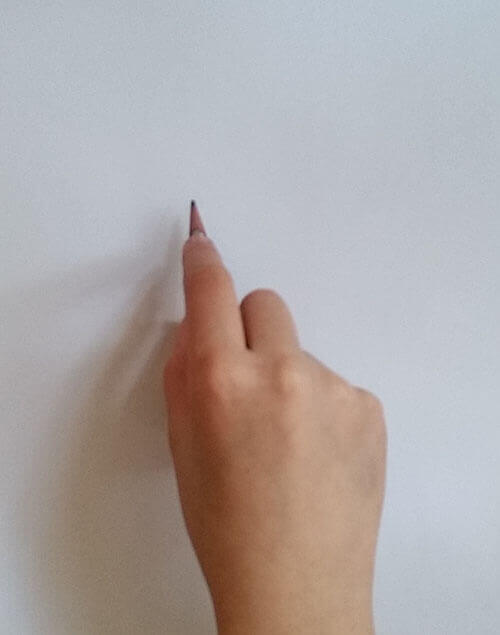
This grip is used when you want to press the tip of the pencil firmly onto the paper. The middle of the pencil is pressed towards the palm of your hand with your ring and little fingers, while the tip of the pencil is pressed towards the drawing paper with your index finger. The result is a strong line. This grip is great if you want to fill in a larger area. This grip forces you to use your shoulders.
“REVERSE” GRIP
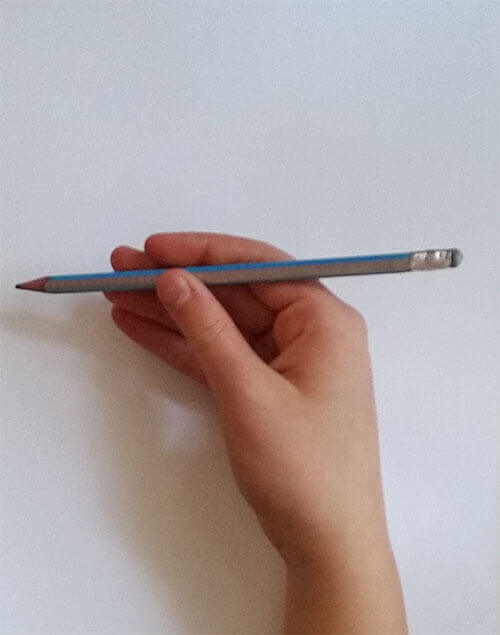
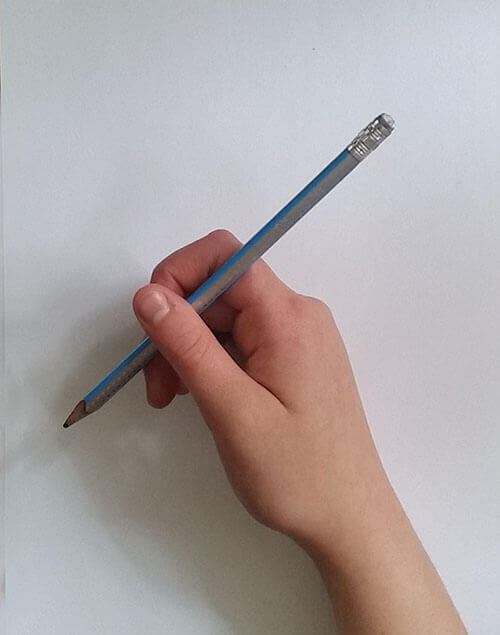
In this grip, we hold the pencil so that the pencil rests on our index finger and we stabilize it with our thumb and other fingers. The tip of the pencil points towards you. We can draw with the tip of the pencil and the side of the tip. (We can shade) This grip is good because we can clearly see what we are drawing and our hands and fingers are not in the way.
“CONTROLLED” GRIP
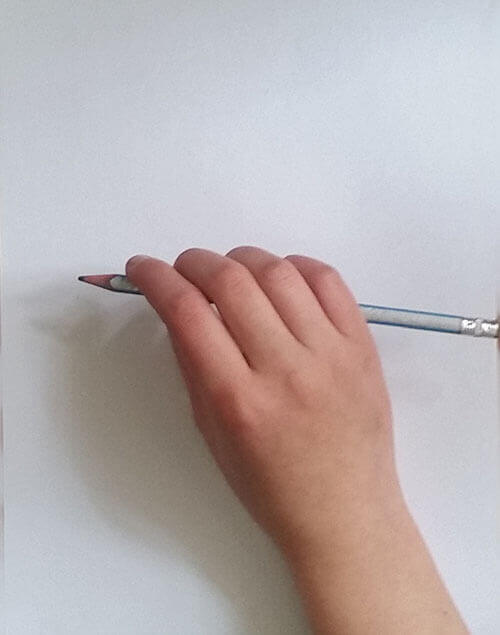
With this grip, you can control the drawn lines with both your finger and arm.
“LOOSE” GRIP
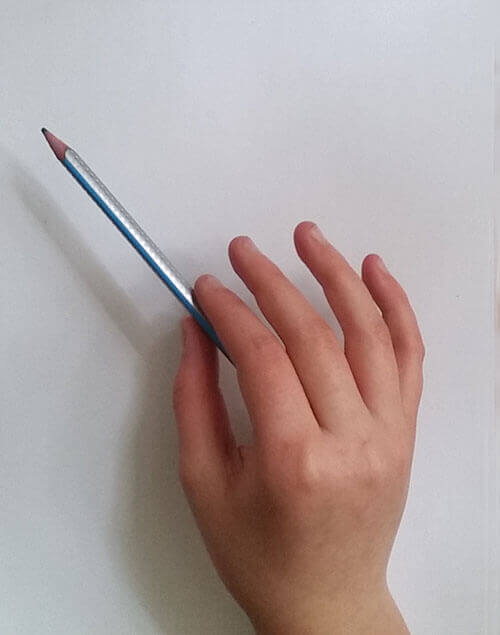
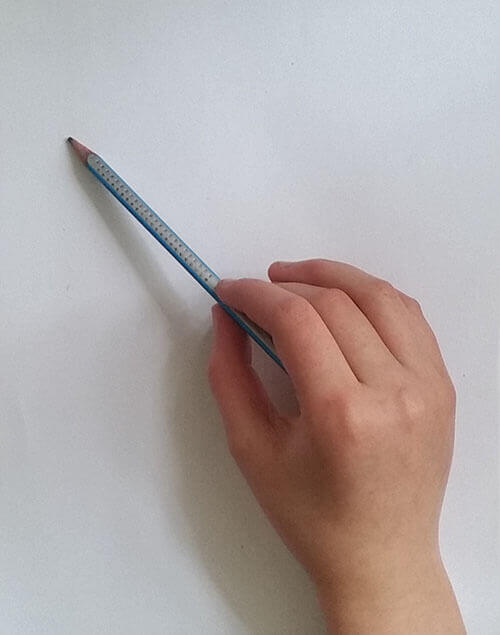
You can sketch large, loose shapes with this technique.
Summary:
- Always start your drawing with large, loose strokes, followed by smaller, more specific shapes, light and shadow, and finally the details.
- Finally, when you draw small details, hold your pencil like you would when writing, because you are only working on a 2-5 cm area.
- Always save the details for last, especially if you are working on a larger scale.
- Always choose a larger piece of paper than you want to draw, because it is easy to cut it off, but it is very annoying if an interesting detail is left out because you run out of paper.
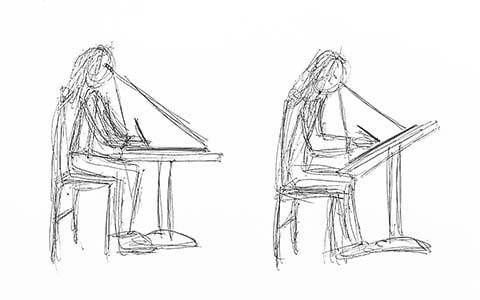
- Also, when drawing, make sure that the top and bottom of the paper are roughly the same distance from your eyes, so that your drawing is not distorted.
- Use a drawing board 🙂 and not on the table. Rest the drawing board on the edge of the table and adjust the angle that suits you.
- You can also use a tilting drawing board.
Which grip have you known or used so far?
It’s time to try and change up your techniques.
If you do this, you’ll definitely improve your drawing skills.
Some of them may seem strange at first if you haven’t tried them before, but with a little practice you’ll get the hang of it.
Thanks for your hand Luci for the photos 🙂